If you’ve ever wanted a way to make mushrooms taste good, stay fresh, and be ready for the week in less than ten minutes, steaming is your answer. This is the kind of meal prep that doesn’t demand fancy gear or hours in the kitchen. Just a steamer, some clean mushrooms, and a little know-how.
The beauty of steaming is speed and control: you get firm but tender mushrooms, their color stays bright, and the flavor stays intact. And because steaming doesn’t drown them in water like boiling does, you keep more of their natural umami and nutrients intact. That’s why this method has become my go-to when I need mushrooms that are ready to toss into salads, grain bowls, or stir-fries during the week.
Why Is Steaming Mushrooms The Most Practical Thing to Do?
Not all cooking methods treat mushrooms kindly. Frying can soak them in oil, roasting takes too long when you’re rushing, and boiling strips away flavor and beneficial compounds into the water. Steaming sits in that sweet spot — quick, clean, and less destructive.
Scientific studies back this up. Researchers who compared steaming, boiling, microwaving, and stir-frying found that steaming was gentler on mushrooms’ bioactive compounds, such as polysaccharides and phenolic antioxidants.
Another study on king oyster mushrooms showed that superheated steam cooking helped preserve higher true retention of nutrients than conventional boiling. For everyday meal prep, I’m obviously not using lab equipment, but I take away a simple lesson: if you want mushrooms that look good, taste rich, and still carry their health benefits, steaming beats most methods.
Mushrooms release water naturally, but because they aren’t submerged in liquid, they don’t become soggy or washed out. Instead, you’re left with a glossy surface, a firm-tender bite, and a more concentrated savory profile. That’s why I often describe steaming as “the muscle of meal prep.” It does the heavy lifting with almost no effort.
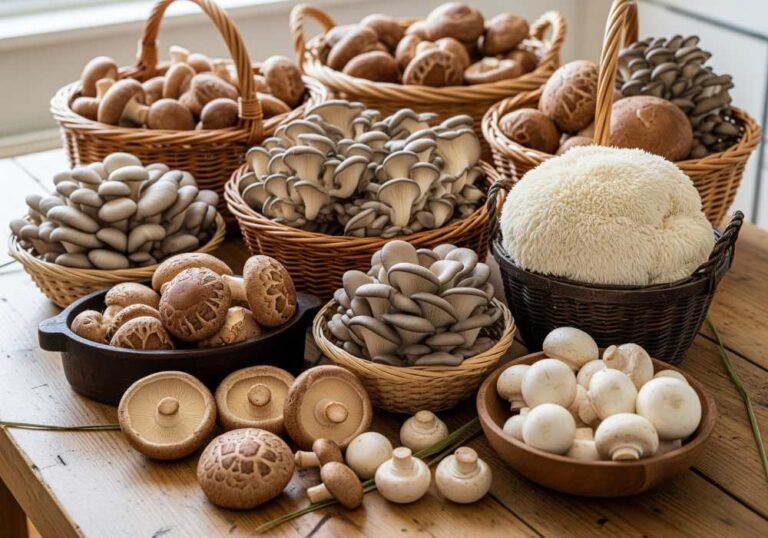
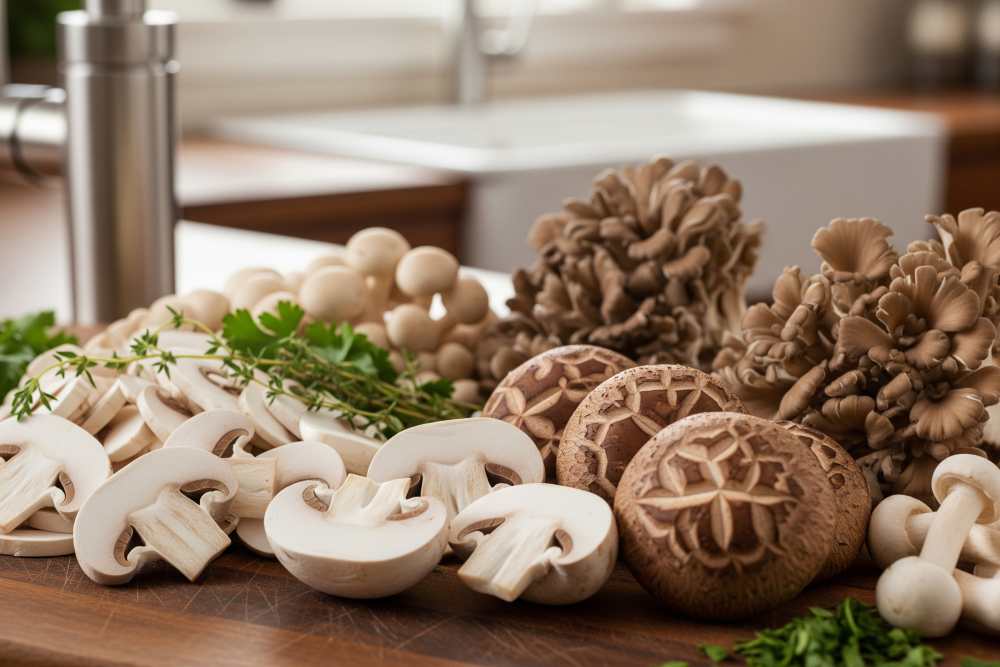
Which Mushrooms to Choose for Under-10-Minute Steaming?
Not every variety cooks at the same speed or gives the same texture, and I’ve learned (the hard way sometimes) that picking the right cap can make or break the final result.
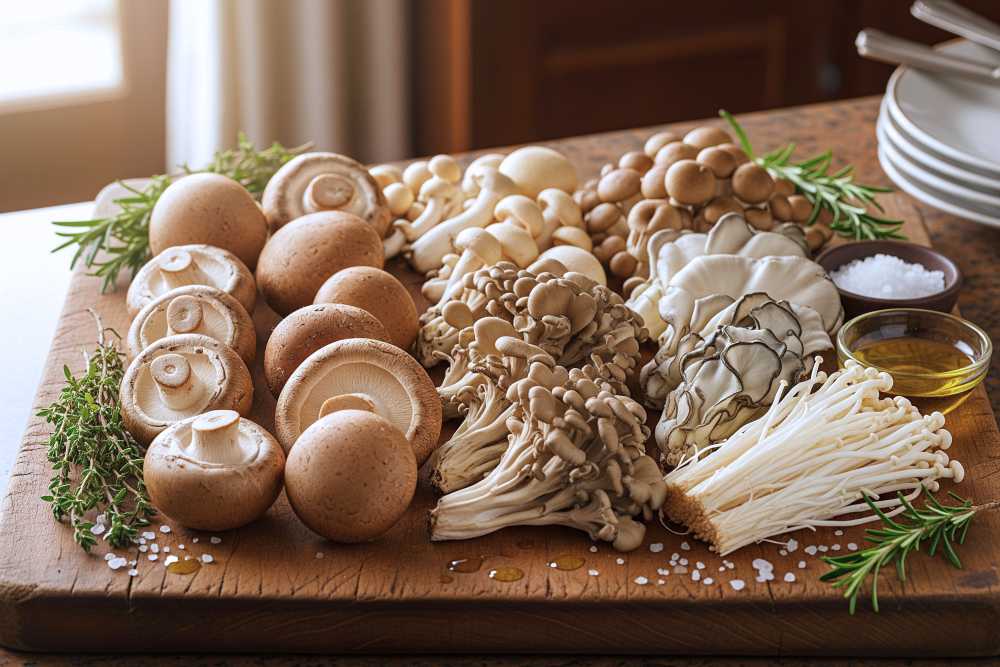
- Button / Cremini mushrooms: These are classics for a reason. Slice them thin and they steam in 3–5 minutes. They hold shape well and are easy to season afterward.
- Shiitake mushrooms: More robust, with deep umami thanks to compounds like eritadenine and β-glucans. I usually steam sliced shiitake for 4–6 minutes; whole caps may take up to 8.
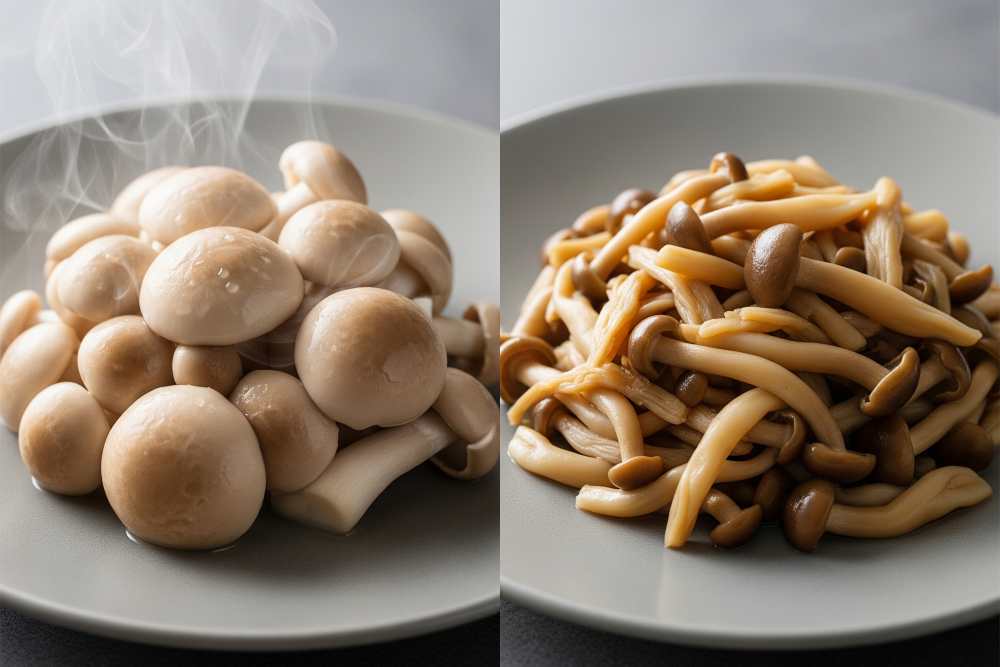
- Oyster mushrooms: Soft and delicate, they need less time — 3 to 4 minutes max. Over-steam them and you’ll lose their subtle sweetness.
- King oyster mushrooms: Dense stems that almost mimic meat when cooked. They need longer (6–9 minutes for thicker slices), but their chewiness makes them perfect for hearty bowls.
- Maitake (hen-of-the-woods): These frilly clusters love steam. They open up, absorb flavor easily, and are ready in 4–6 minutes.
- Enoki mushrooms: Super thin, almost noodle-like. They’re done in 1–2 minutes. Any longer and they lose their crispness.
Prepare meals with cremini and shiitake because they strike the best balance of speed, flavor, and nutrition. But on weeks when you want something special, throw in maitake — it turns into a tangle of savory ribbons that brighten any dish.
Timing, Cut and Batch Rules (Cut for Speed, Steam for Texture)
When it comes to steaming mushrooms, timing is everything. Too little and you’ll bite into raw chewiness; too much and you’ll get limp, waterlogged caps. What controls this balance? Cut size and mushroom density.
Think of mushrooms like sponges — heat softens their cell walls, releasing some moisture while transforming their structure. A thin slice steams through in minutes, while a thick king oyster stem takes its time. If you try to cook them all together without adjusting the cuts, you’ll end up with an uneven batch.
Here’s the framework I use in my own kitchen:
- Thin slices (2–3 mm): Done in 2.5–4 minutes. Perfect for tossing straight into salads or wraps.
- Halved buttons / quartered cremini: 4–6 minutes. These keep more bite for reheating later.
- Whole shiitake caps or thick king oyster slices: 6–8 minutes, depending on size.
- Frilly clusters (maitake): 4–6 minutes, but spread them loose so steam reaches all sides.
The doneness test is simple: the surface should look glossy, the cap should feel firm but tender when pinched, and that raw earthy bitterness should mellow into savory depth. This way, you don’t have to stare at the clock – you can trust your senses.
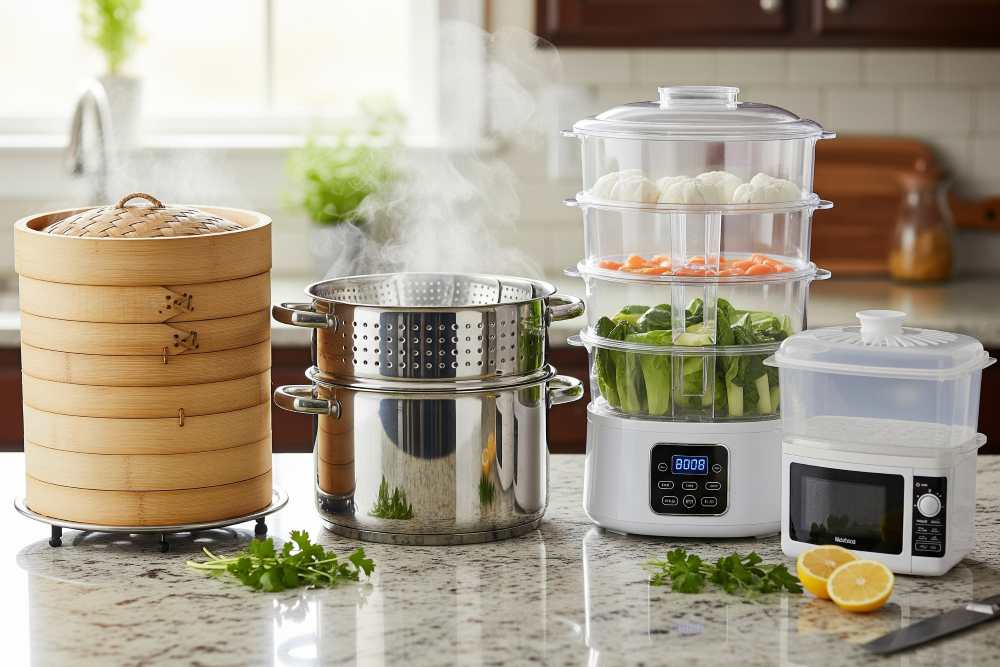
Required Equipment & Techniques for Ideal Steaming
Here’s where most people overcomplicate things — you don’t need industrial gear to steam mushrooms well, but your choice of equipment shapes your workflow. I’ve experimented with almost everything, and here’s how it breaks down:
Stove-top steamer baskets (bamboo or metal): Fast, scalable, and budget-friendly. Great for family meal prep.
Electric countertop steamer: Its strength is consistency. You set the timer, walk away, and come back to evenly cooked mushrooms.
Microwave steamer: My guilty pleasure when I only need a single portion. Quick, but less control over texture.
Pot + perforated rack setup: This is the no-frills version. It works just fine if you don’t want extra equipment.
Superheated steam (advanced/industrial): This is where food science comes in. According to research, superheated steam preserves higher true retention of antioxidants and bioactives in mushrooms compared to traditional steaming. It’s not something most of us have at home, but it shows why steam quality matters.
Technique is equally important. A few rules of thumb I always stick to:
- Preheat your steamer before adding mushrooms. Cold-start steaming gives uneven results.
- Don’t overcrowd; give the steam room to circulate.
- Place thicker cuts closer to the direct steam flow.
- Use parchment with small slits if you hate mushrooms sticking to the basket.
These small tweaks give you the consistency that separates soggy meal prep from restaurant-quality batches.
Seasoning & Finishing Strategy (Flavor in Two Acts)
Steaming gives mushrooms a clean, neutral canvas — but let’s be honest, nobody wants to eat them plain all week. The trick is to season smartly, and in two stages.
Act One: Steam plain. Most people resist this part, but steaming mushrooms without salt or heavy seasoning keeps their texture intact. Salt too early, and they’ll purge excess water, leaving you with shriveled caps.
Act Two: Finish bold. Once steamed, add fat, acid, and aromatics. A quick toss in a hot pan with oil or butter lets the mushrooms absorb flavor without losing their bite. Alternatively, keep it cold-prep friendly by whisking up a light dressing and pouring it over cooled mushrooms.
My go-to finishing Tick boxes:
Garlic–parsley butter: 30-second toss, classic European flavor profile.
Sesame–soy–ginger: Asian-inspired, savory and fragrant; a few drops of sesame oil go a long way.
Olive oil–lemon–herbs: Clean, bright, and perfect for grain bowls.
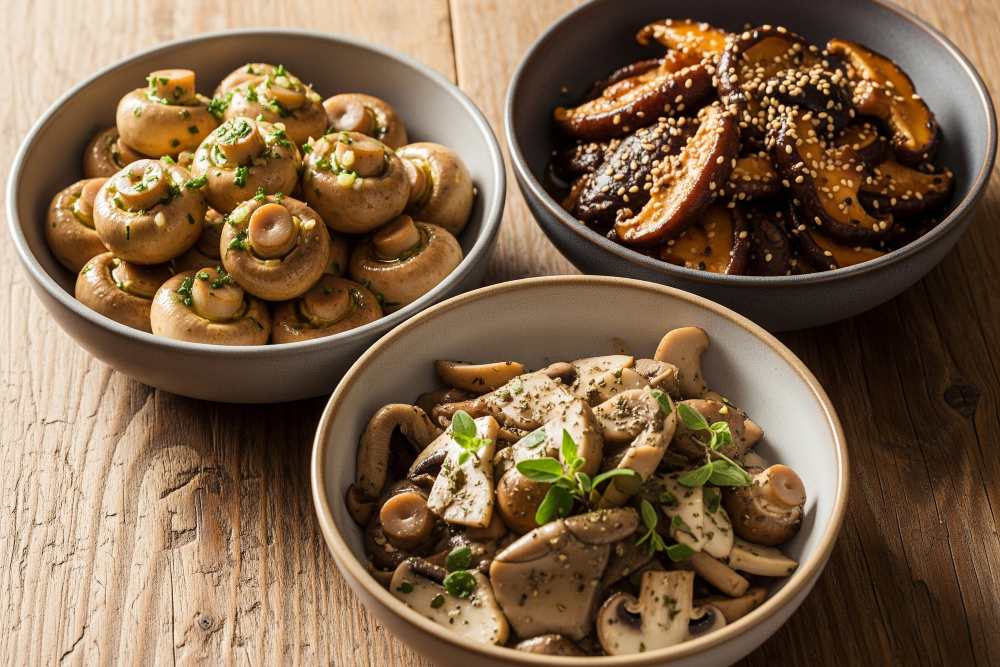
You can always finish with an acid—lemon juice, vinegar, or soy. Without it, mushrooms taste flat, no matter how well they’re cooked. The acid sharpens flavors and cuts through the caps’ natural richness.
You can prepare one big batch plain, then split it into smaller portions and finish each differently throughout the week. That’s variation without extra work.
Recipes you may also like:
Closing Takeaway
Longer steaming breaks down valuable compounds and dulls texture. Advanced methods like superheated steam can preserve more nutrients. Still, for home cooks, the simple steamer basket already provides more than enough.
Meal prep is about making life easier without sacrificing quality. Steamed mushrooms, done right, strike that balance. They’re quick, adaptable, and — if you ask me — one of the most underrated meal-prep staples you can add to your routine.
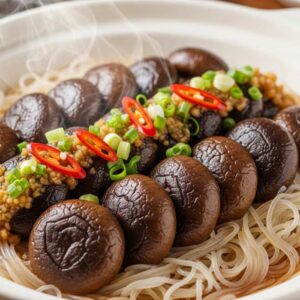
Cantonese-Style Steamed Mushrooms with Garlic Soy & Vermicelli
Equipment
- Steamer basket with tight-fitting lid
- Wok or deep pot (to hold the steamer)
- Heatproof plate (22–25 cm)
- Steamer rack/trivet (if using a pot)
- Knife and cutting board
- Small mixing bowl
- Tongs or heatproof gloves
Ingredients
- Fresh shiitake mushrooms – 200 g 16–18 medium or dried shiitake rehydrated – 12–14
- Glass vermicelli mung bean thread – 50 g (dry)
- Garlic – 3 cloves finely minced (about 1 tbsp)
- 2 tbsp Light soy sauce
- Oyster sauce or vegetarian mushroom sauce – 1 tbsp (optional)
- 1 tbsp Sesame oil
- 1 tsp Sugar
- 1/8 tsp White pepper
- 1 tbsp Neutral oil
- 2 tbsp Water for sauce + water for steaming
- Scallions – 2 thinly sliced
- Fresh red chili – 1 small thinly sliced (optional)
- 1 tsp Rice vinegar optional, for finish
Instructions
- Soak the glass vermicelli in warm water for 10 minutes until pliable; drain.
- Trim shiitake stems. If mushrooms are large, lightly score the caps.
- Mix soy sauce, oyster sauce (if using), sugar, sesame oil, white pepper, garlic, neutral oil, and 2 tbsp water to form the sauce.
- Spread drained vermicelli on a heatproof plate, toss with a drop of oil, and place mushrooms cap-side down on top. Spoon sauce evenly over.
- Place a plate in a steamer over simmering water. Steam covered for 6–8 minutes until mushrooms are tender and noodles glossy.
- Optional: Rest 2–5 minutes off the heat to let noodles absorb the sauce.
- Garnish with scallions and chili. Add a splash of rice vinegar if desired. Serve hot.
Notes
- Mushroom choices: Shiitake are classic; enoki or oyster mushrooms steam faster.
- Dried shiitake: Soak in hot water for 20–30 minutes, squeeze dry, and use soaking liquid instead of water in sauce.
- Vegetarian/Vegan: Replace oyster sauce with vegetarian mushroom sauce or skip and adjust sugar.
- Gluten-free: Substitute tamari for soy sauce.
- Make-ahead: Assemble up to 2 hours in advance, refrigerate, and steam before serving.
- Safety tip: Always open the steamer lid away from you to avoid steam burns.